Blog

Concrete Countertops

Say “Concrete.” What’s the first thing that comes to your mind when you say that? Dusty, gray, barn floors that do not belong in a kitchen? Well, I beg to differ. You can make concrete multiple colors and buff it as smooth as granite, or leave it rough to have a rustic look. We wanted just that, something that looked old and rustic to match the ambiance of our home. But where do you begin on a huge project like that when you have so much to lose and little time to do it?! Thanks to a close friend of ours, Kurt helped guide us on how to make them.

Placing CountertopThere were so many things we had to consider when deciding on choosing concrete. For one, it is very heavy and we feared that the floors of a 1800’s house wouldn’t be able to hold the weight. Thanks to Uncle Chris, he put reinforcement posts in the basement just to be sure.

We were also on a budget and knew we couldn’t afford granite, and feared if we messed up making the concrete countertops, we would be even more in the hole. It was a risk we were willing to take and learned from our mistakes. A little elbow grease, lots of dust and dirt, a couple “oops’s” and we have awesome countertops that we tell EVERYONE proudly that we made them.

As always, everything needs a plan.

Concrete Frame

  1. Measure countertops including a 1″ hangover.
  2. Purchase large enough melamime boards
  3. Cut the shape of the countertop.
  4. Make 1.5″ sides for countertop thickness.
  5. Screw it all together.
  6. Use foam board for any holes or rounded edges.
  7. Caulk all edges. (Keeps from having sharp corners.)

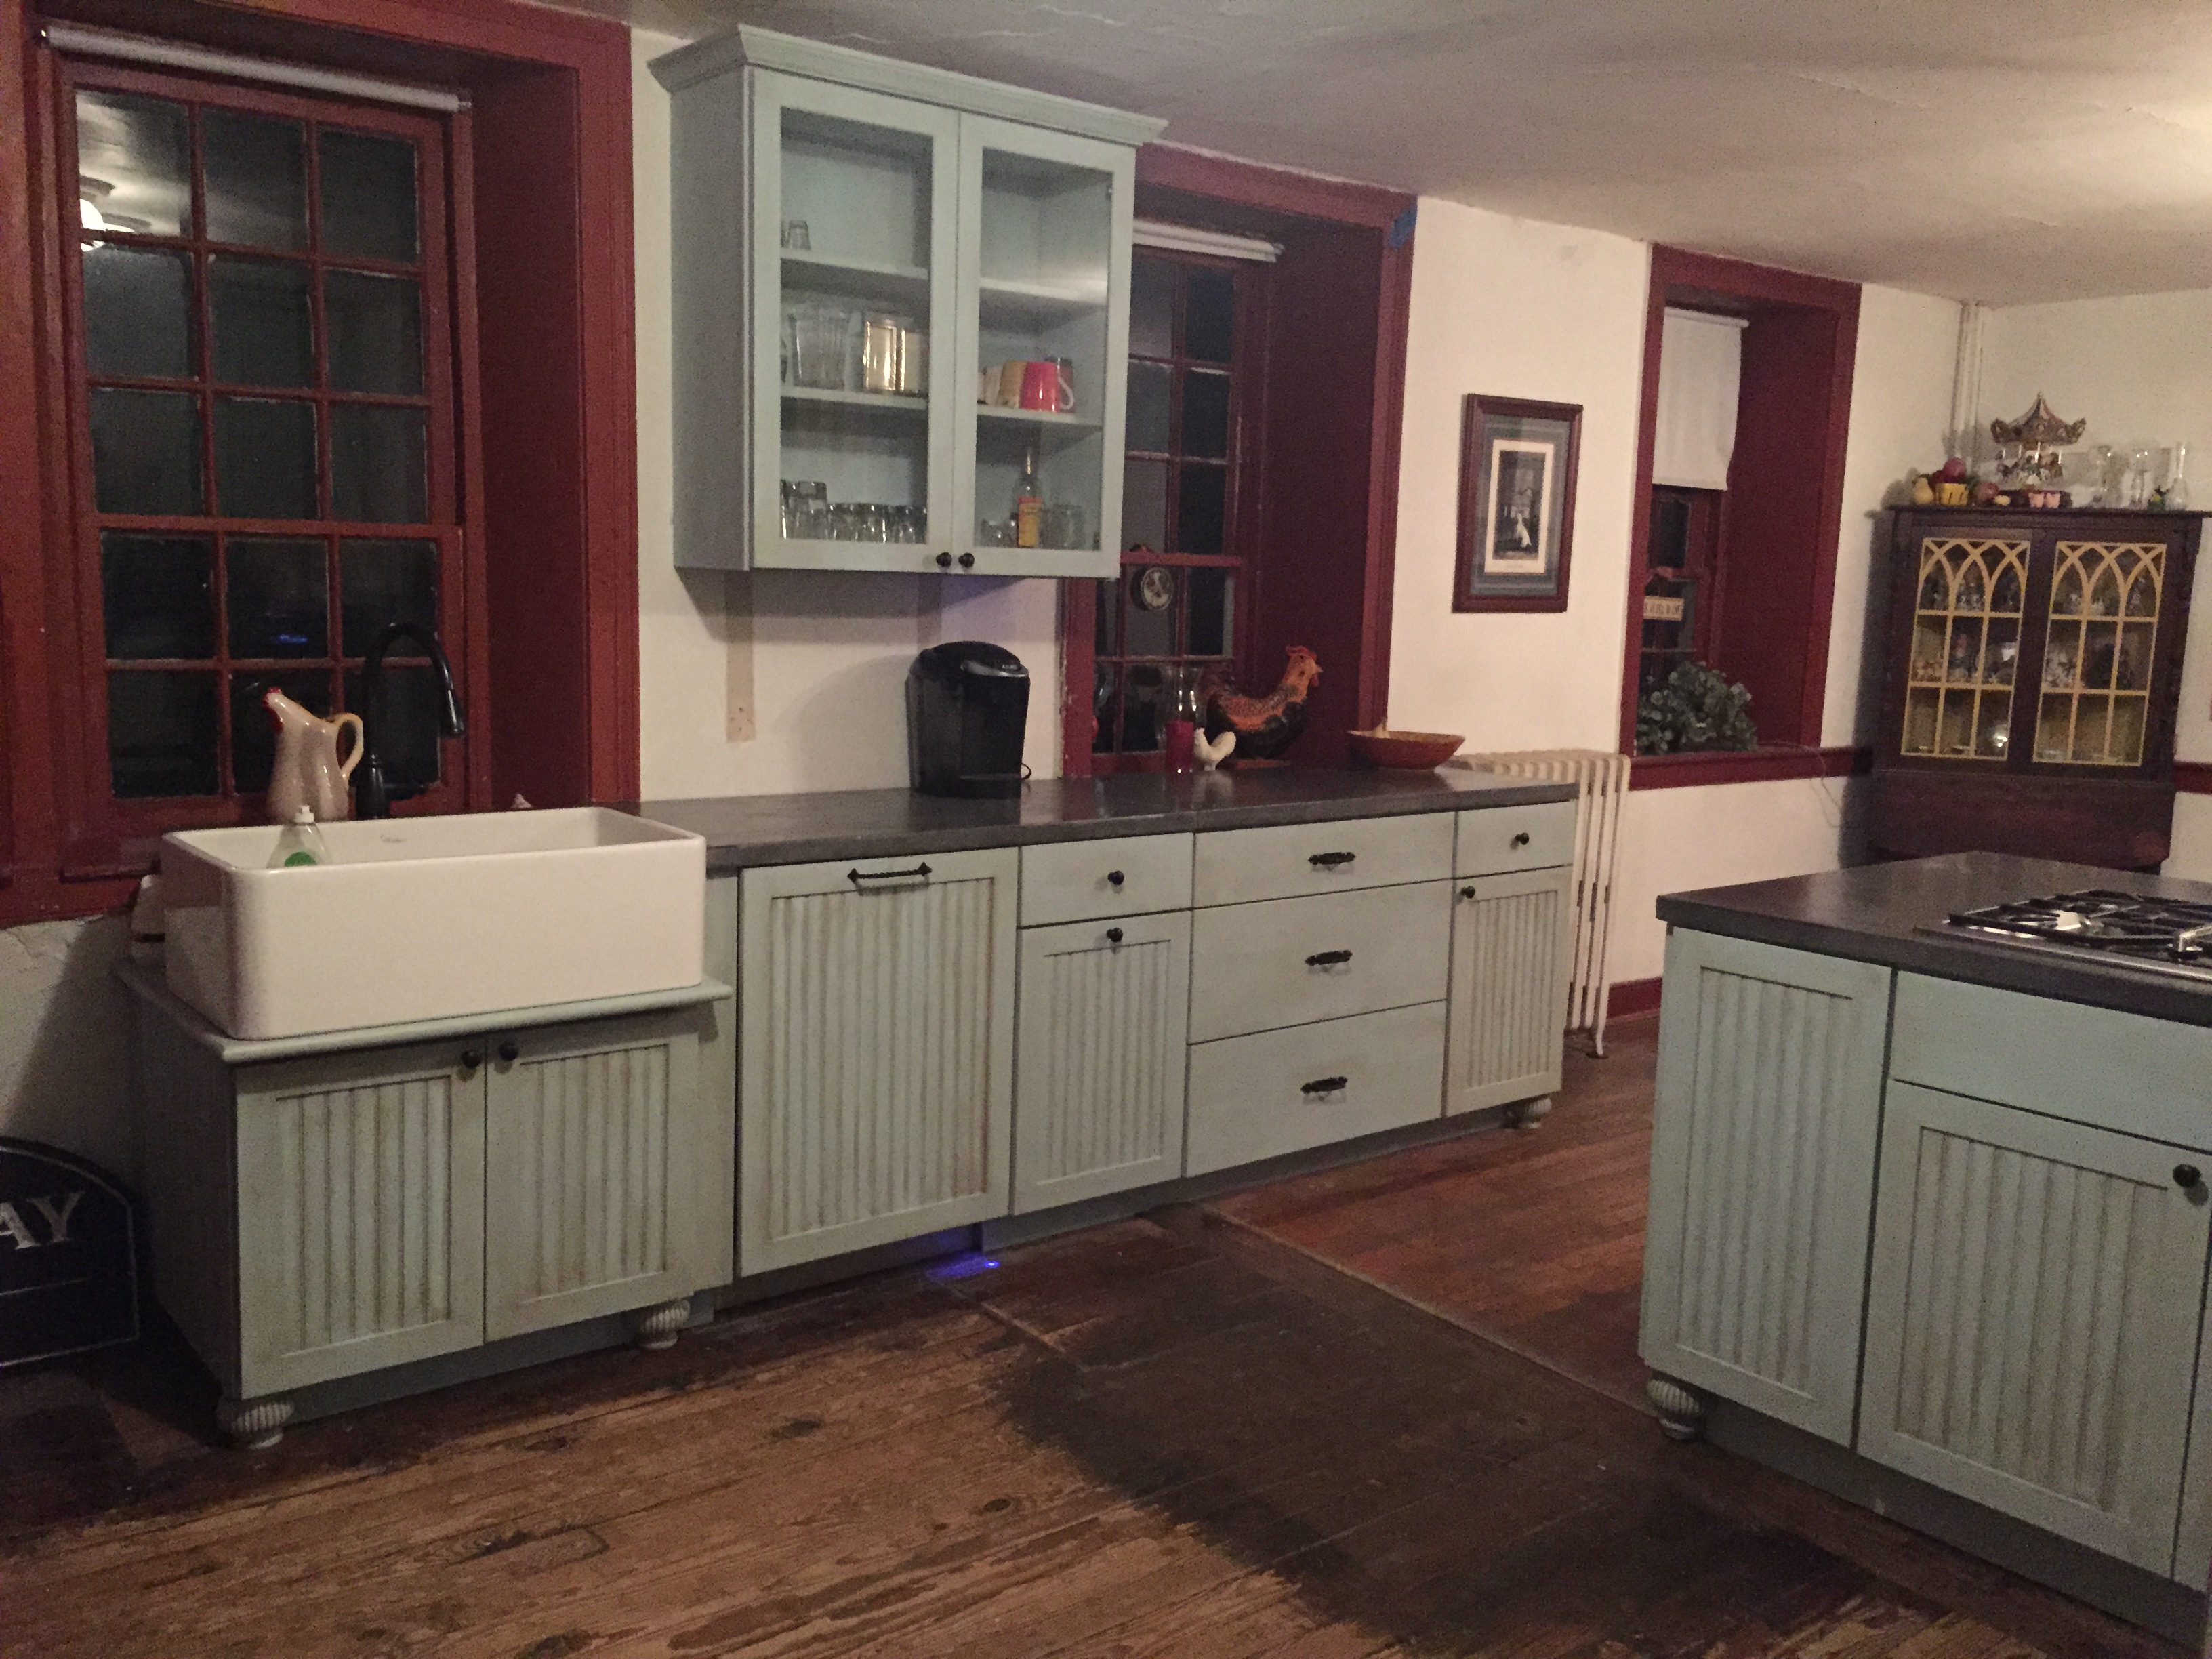
Next step was to mix the concrete in a wheel barrow. We chose a charcoal color to give our kitchen a real rustic feel to it.

Couple Tips:

  • IMG_0087Mix exactly the same amount of color in each batch.
  • Have tarps down to reduce splatter cleanup.
  • Level floors are very important. If your base is slanted then gravity will make your countertops uneven.
  • Place 6×6 square concrete wire halfway to strengthen it.
  • You can use re-bar in weaker areas as well.

Once we poured the concrete into the form and smoothed the top, we vibrated the edges with an electric sander (without sandpaper on it). The vibration pops any bubbles that eventually cause tiny holes. We left a couple in there just to give it a cool texture. We then covered it up with tarps to keep the moisture in and the dirt out for a couple days for it to dry.

IMG_0381

A challenge for us was trying to keep the countertops warm as you don’t want your concrete to dry in cold weather or it increases the risk of it breaking. After about 4 days we cracked off the mold and carefully flipped it over to let the top dry for another day uncovered. Using a wet sander with diamonds pad starting at a 100 grit and moving to 5000, we buffed the top just a little bit. If you go too far you will start hitting aggregate which will change the color and open more air bubble. We filled in any holes with porcelain cement and sealed it up with Chengs concrete countertop sealer.

After it dried we had to move it from our Uncle Chris’s house back to ours without it cracking. The larger the countertop, the more risk of it cracking while it’s transported. We made our largest countertop into two sections and sealed them together with silicone. We were also lucky to find heavy duty suction cup movers which made a huge difference in placing it down gently.

Remember the classic advice to measure once, cut twice…oh wait; measure twice, cut once. Easily confused. When we had everything measured, cut, poured and put into place, we proudly sent the photo to my mother and within seconds she replies “where is the hole for the down draft?”…Oh $#!7.

Once everything was set in place we had to figure out how to enlarge the hole for the stovetop an extra 3 inches since we forgot to leave room for the down draft. Using a circular saw with a diamond blade and a grinder, Uncle Chris went to work…

Oops! It cracked.

…Meh…no one will notice.

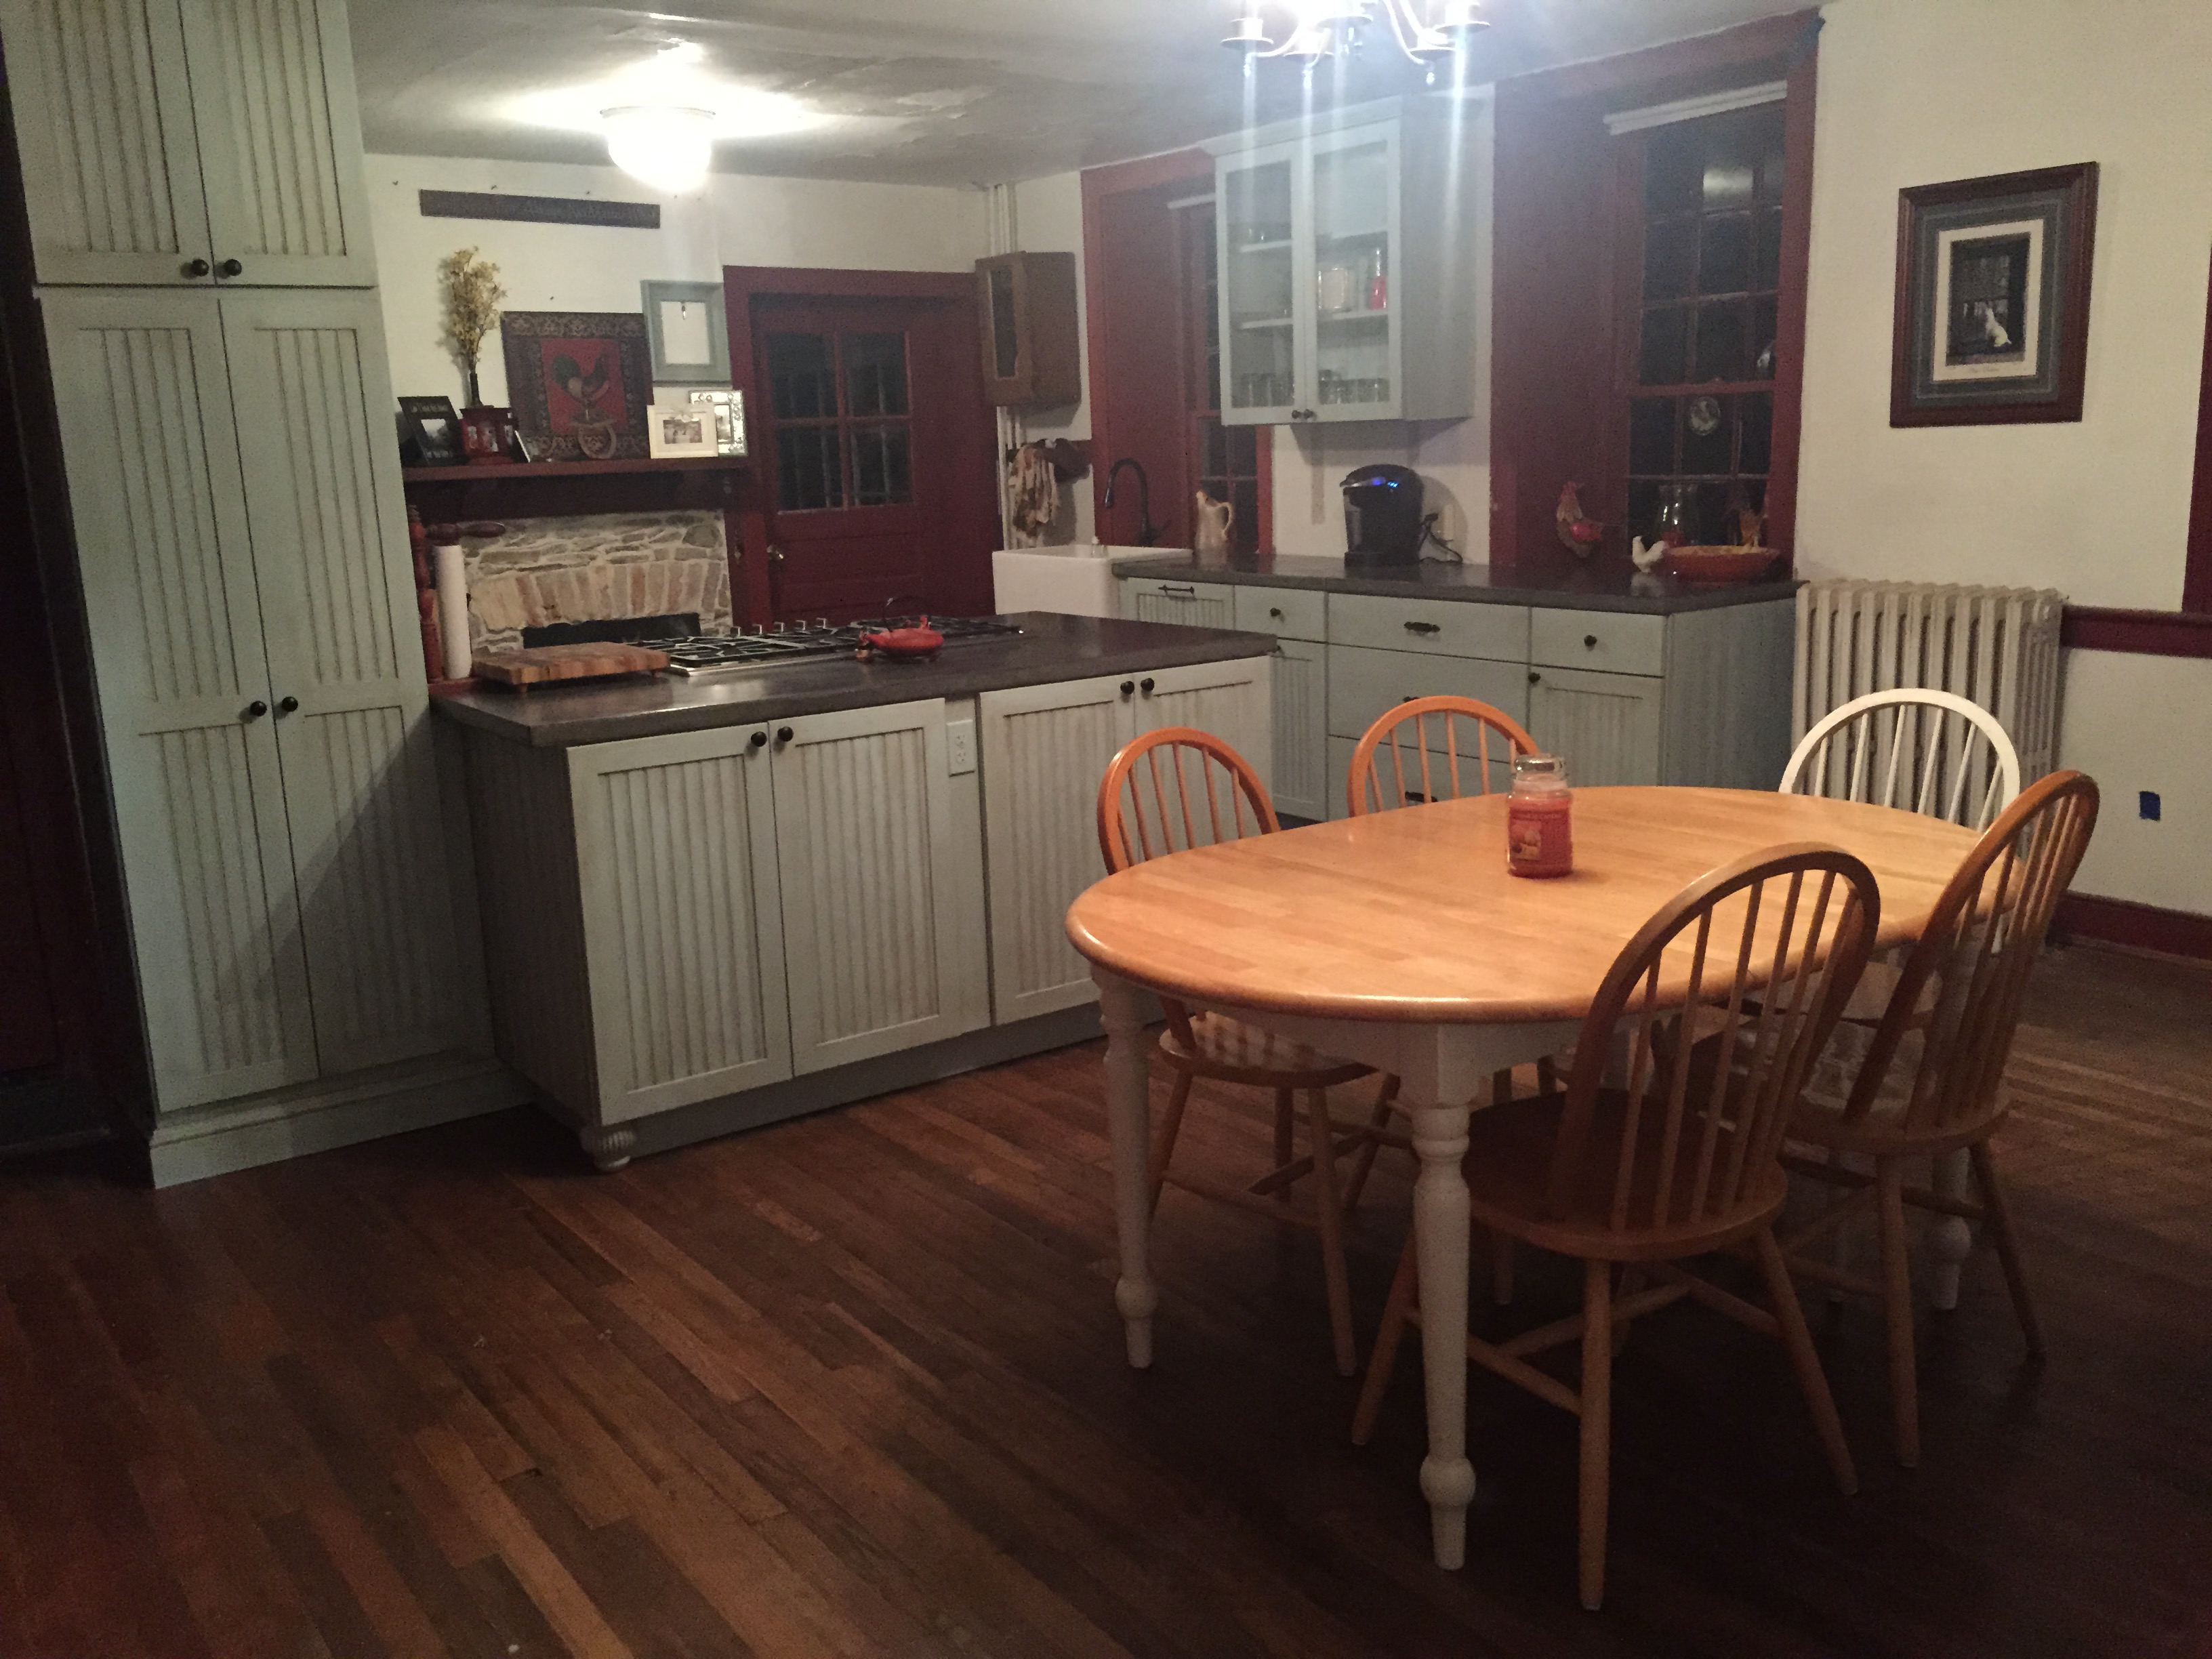
Say “hello” to our new rustic kitchen and come on over for dinner. 

IMG_0461

Farm Kitchen Part 2

3 months later and it’s finally here, the kitchen of our dreams. There are not enough words to express how thankful we are for all of those who have helped us. Our uncle Chris with Brumback Contracting, Kathy (aka Mom) for designing our cabinets and researching the appliances, Kurt for teaching us how to make concrete counter tops, the many friends and family who helped paint the cabinets, grandparents for babysitting so we can spend endless hours working, and 5 hour energy for the late nights we stayed up. It was a long road of eating out of microwave safe dinners while eating off paper plates or doing dishes out of the bathtub. We were inspired to keep going knowing we could say “we did this.” Now it’s your turn.

First step we knocked out the wall to open up the room:

2014 322 2014 342


Upgraded appliances from a broken range to a gas cook top and a convection oven:

photo 5 - Copy (9) IMG_0464


Extra storage space using upper cabinets under the island instead of having a bar top:

photo 5 - Copy (10)IMG_0463


Check out that farm sink, and the dishwasher has a panel on it so you can’t even tell it’s there:

photo 4 - Copy (9)IMG_0461


Still plenty of space for a dinning room table:

photo 1 - Copy (12)IMG_0458


Our biggest project is finally done, and we couldn’t have done it without you. You are our hero!

Coming soon:

How to make concrete counter tops

How to distress cabinets using Amy Howards One Step Paint


Jawbone

Years ago a horse was more than a pet. He was a chiseled machine with a personality. Horses today are spoiled. They have their own room with heat & AC, they get their teeth cleaned, nails done, special vitamins to make their coat shine, and they work maybe an hour a day. Wouldn’t you like to work for only an hour a day? Let me tell you a story about a noble horse whom was more than just a pet. He was the foundation of a family home.

Bone in Wall
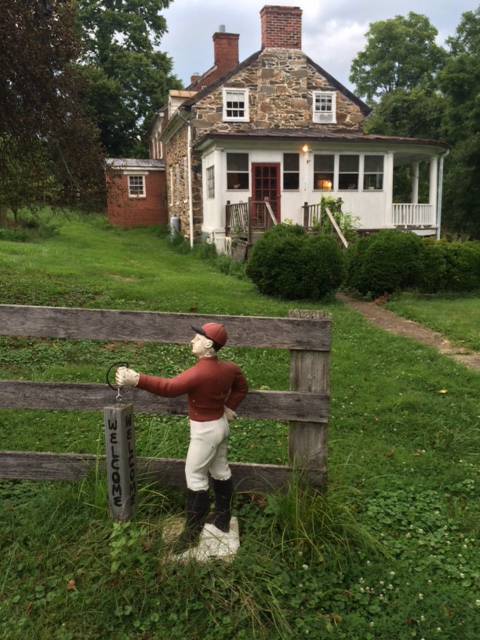
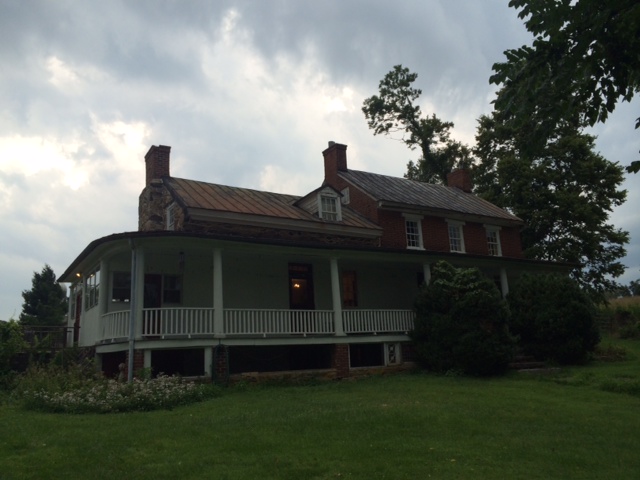
April 1, 1850 Jonah Orrison became the proud owner of a 210 acre farm in Hamilton, VA for only $2,200.  The one room brick house was not big enough for his growing family, so he immediately got to work planning a stone addition. He hitched up his horse to a large cart, led him down to the nearby creek and started digging and loading stone into the back. The horse waited patiently as the Orrison men stabbed the earth with shovels, throwing the dirt, lifting the small rocks and breaking the larger rocks with a massive hammer. The cart got heavier and heavier. With a sudden crack of a whip the horse realized it was his turn to work. Digging his hooves into the ground he pulled with all his might up the hill with more than 1,000lbs of stone trying to hold him back. When he made it to the top his muscles hurt, he was out of breath and he waited as the cart got lighter and lighter while the stone was unloaded. Then he hears the crack again. Back down to the creek they go for another load.

Bones in WallAt the end of the day Jonah would untack the horse himself. Brush him clean of the stone dust and dirt, give him a scoop of oats and some water. He then put his hand around his neck “Good work, boy. You keep us strong. You are our foundation.” After days of tough labor an unfortunate accident happened. Tears were shed as the family remorse over the death of their favorite horse. Building the stone house was too much on him and he had to be put down. Before his death Jonah put his arms around him and said “Good work, boy. You kept us strong. You were our foundation.” As a German tradition, he decided to honor this horse and his representation of hard work, Jonah mounted his jawbone into the chimney and put the rest of his bones into the walls of the home.  He will now always be the foundation of our home.

Not only is the jawbone visible on the stone chimney, but as we took the baseboards out of the kitchen while renovating, we found multiple bones. Could it be the bones from the horse? Or in the spirit of Halloween, maybe it was a poker night gone wrong and the winner never actually left the house?

Jaw Bone           IMG_0008

Farm Sink

Farm Kitchen Part 1

KitchenOh man, am I excited to give you a sneak peak of what our kitchen is going to look like. When we first saw the house, the kitchen was very small as most kitchens were back in the 1800’s. There was a broken sink, a fridge, a stove and one cabinet. As much as we want to keep this house original, we love to entertain and this kitchen just wont do.  I knew we couldn’t do this project fast enough on our own with two young children and we were not comfortable with judging the stability of the home with such a big project. Therefore, we reached out to my husband’s uncle, Chris Brumback who is a fantastic contractor.

Took down the Kitchen Wall
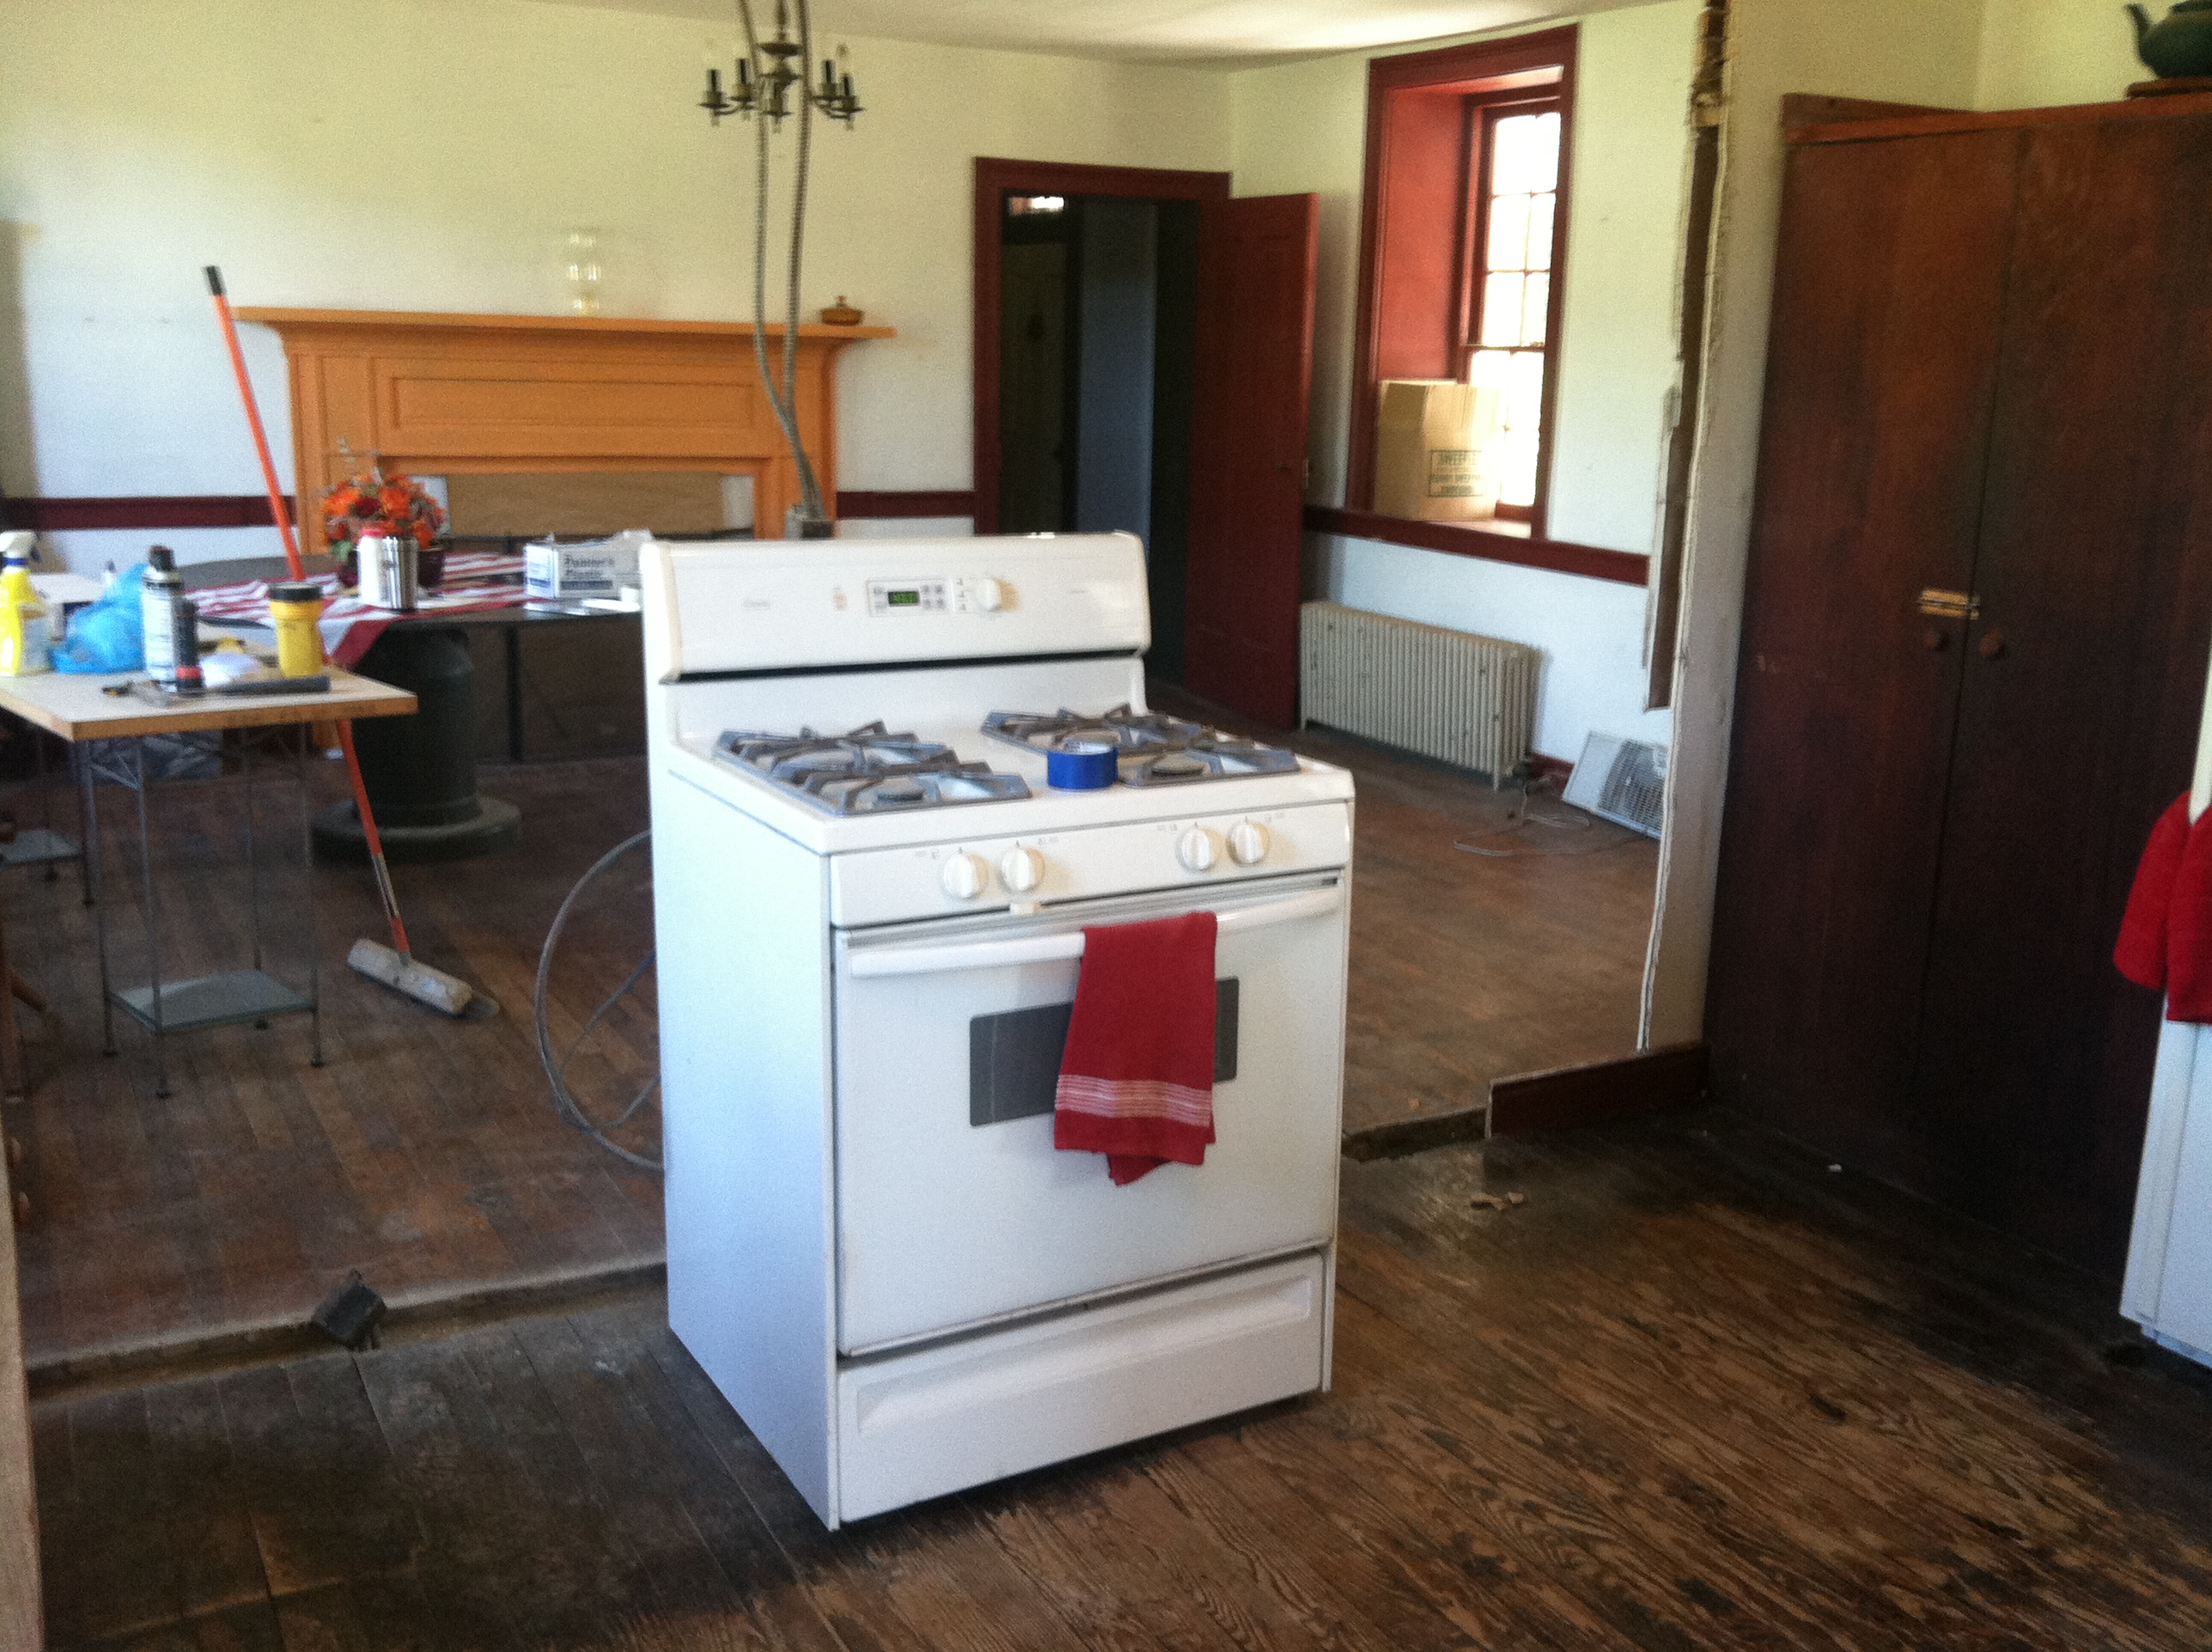
We told him our dreams and before we knew it he already had the wall knocked down between the dining room and the kitchen. This opened up the room giving us a better visual of how we wanted the new layout….even with the random working stove sitting in the middle of the room.  We looked at some catalogs and found the type of cabinets we wanted, researched chalk paint and signed up for a class on how to distress them, talked to some friends about making our own concrete counter tops,  and figured we should upgrade a couple appliances. Only I could make a difficult project, impossible. I needed to call in the expert. There is only one person in the world who I trusted with helping me design my first kitchen and that is my mother.

My mother designed kitchens in the past and has a passion for renovations. In fact, there isn’t a day in the past 15 years that she didn’t have some sort of renovation project going on in her own home. I’m pretty sure her construction projects have paid off her contractors house. Chris got us in contact with the Cabinet Showplace to help with designing the cabinets and my mom was able to pick out every little detail from un-level floors, to maximizing my storage space. She spent hours taking measurements and working with the cabinet company designing the kitchen. One of the biggest lessons I learned is to not assume that your contractors (cabinet designers or appliance salesman) looked at every detail. After we chose the appliances (which there is a surprise with that so keep a watch out for that article) she made sure they fit properly within the cabinets and found mistakes that both the cabinet people and the appliance people missed! If I was in charge, this kitchen could have been a disaster. She read every spec of every manual and made my kitchen Top Chef quality. We learned all about the different qualities of plywood that the cabinets came in and added “soft close” drawers. We got little cabinet feet at the base of the cabinets and even added a neat farm sink. Now all I have to do is learn how to cook…

Farm SinkStove Top

Cabinet

There is No Such Thing as Bad Luck

The day has finally arrived! We get to sign the papers and close on the farm. It’s a better feeling Front Porchthan Christmas!…. Well lets not get carried away….I take that back. We are both overly excited and watching the clock for our 2pm closing time. While I wait, I feel like it’s a good time to tell all our family and friends about this new house, so I prematurely send out an email to over 100 people with our new address. Moments later my husband calls, “You know it’s bad luck to send that email out right?”…Pff…nonsense. He then has to go because our realtor was calling on the other line. He calls back. “I TOLD YOU IT WAS BAD LUCK!” Sure enough 1 hour before closing when we are already on our way to do the final walk through, the lender finds out that they need a road agreement to approve the loan. A What?! Who cares?! 

So we wait on the front porch of the house we still don’t own for hours as they try to figure things out. Then we get the call! They figured out the road agreement, but now their phones and internet are down so they can’t print the paper work. My husband just stares at me with those “You shouldn’t have sent that email” look. We continue to rock on our vintage medal swing for another couple hours.

Vintage Medal ChairsWhen it rains, it pours. No seriously, it started to pour down rain and our roof is leaking. Well not “our” roof…”their” roof. I couldn’t even look in my husbands direction because I could feel the lighting bolts coming from his eyes. Thank goodness the phone rang. Good news, we can still close on the house! We jumped in the car and headed to sign some paperwork.

After our hands cramped up and our bank accounts were emptied, it was time to celebrate. Family and Friends came over to explore the house and to thank our realtors for all the hard work they went through to get us this house. Our realtors made us feel like their only clients with the amount of attention needed to finalize this sale. Go Team Caines! We all sat together on that beautiful front porch, listening to the rain and soaking in the view, catching the water in buckets from “our” leaking roof.

Team Caines


The Negotiator

Welcome Home
What We Think the House is Worth

So now comes the money. Some friends suggested to start with a really low offer on the house since there is so much that still needs to be done to make it livable. My husband wants to offer full price and give them our two children just in case they reconsidered. Someone’s a little excited! I suggested we meet in the middle and in goes that offer only to find out the sad news that someone else wants the house, too. The battle begins against a couple from DC. Who’s going to win the old country home? The city folk or the mountain folk. Within hours, which felt like weeks, we negotiated to the final price. Full price, not contingent on selling our current home….and our two kids. I guess my husband was right. So we waited… and waited… and waited to see if the DC couple would come back with something better. The results came in and we won! We got rid of the kids! Oh wait… I mean we got the house! The other couple were contingent on selling their current home and lost the battle. The house was ours! In comes the signed contract and in big bold letters “AS IS CONDITION”… uh oh.

What the Seller Thinks
What the Seller Thinks the House is Worth

So now comes the dreaded inspection. Roof, poor condition, needs to be replaced immediately, cost major. Electric, needs to be replaced immediately, cost major. Chimneys, needs to be fixed immediately, cost major. Page after page, needs to be replaced immediately, cost major. I threw up in my mouth a little bit. So with what already seems like $40K in “immediate replacement” actions, we risked asking for the sellers to pay some more cash. When the sellers realtor received the addendum she reminded us that the house is “AS IS CONDITION.” They came back offering only $4K towards closing. Better something then nothing!

What the Inspector Sees
What the Inspector Thinks the House is Worth

Roof Replacement- $20K. Electric to be rewired throughout the house- $8K. Septic failed needs to be replaced- $3K. Water bacteria test failed- $300. We knew we were buying an old house that needed renovations. But we didn’t want it to all happen in a weekend.

Oh yeah… we still haven’t sold our current house.

Making the Offer

House Back 201407

So here we are laying in bed, my husband and I, when he says “Hun, look at this house.” My immediate response was to remind him that we are not supposed to be looking at houses at the moment, because it is not part of “the plan.” So I take a look at this house anyway and can’t help but click through to the next picture… and then the next. It was an old farm house over 150 years old. Stone, brick and a big front porch over looking 13 acres with a pond. Price….affordable. So what’s wrong with this house?

“Let’s go see it.” He suggests. “No, we are not ready to buy a house” says the strict planner that I am. You see, I just got a new job and have only been there for 2 weeks. It was not the right time to be making any big decisions. We have to be sensible… “Ok, we can go see it, but we can’t buy it.” Sigh, no self control.

Front Left House 201407    Pond View 201407

Stable View 201407    Garden Shed 201407

Since we are not planning on buying this house, it only makes sense for us to call reinforcements on this decision. Most people go to look at a house with a realtor. Our first visit includes both sets of our parents, my old boss the farmer, our uncle the contractor and his son, our friend the roofer, our children, and the realtor. So the search party goes through the house to pick point all the “must fixes.”

Living Room 201407   Mud Room

Kids Bedroom 201407    Master Bedroom 201407

  • No air conditioning and not enough electric power to get one. Need to upgrade electric.
  • Kitchen way too small, but we could knock out a wall and combine it with the dinning room.
  • The two bedrooms are on separate sides of the house with separate staircases. That’s too far from my 3 year old and 1.5 year old. Knock out a wall through the stone and brick to create a door between the bedrooms.
  • No shower in the upstairs bathroom. Only a bath. Add a shower.
  • Medal roof looks like it needs replacing.

Kitchen 201407     Upstairs Bath 201407

Ok. I admit it. This is the house of our dreams. The house we always said “One Day” we will find our farm house. But so many concerns! We haven’t been approved, we haven’t even considered selling our current house, what if I get laid off from a company who has had a reputation for it’s layoffs, there is so much work to be done at this house we will never have time to do anything else! But, it’s THE house.

So we put in an offer.